Free Inner Tubes!
On a related note, my gravel bike runs tubeless now.
Created:
Updated:
Everyone loves free crap, we can’t help it. We know that there’s got to be a catch but we soak it all up anyway because heaven knows when we’ll get free stuff again.
Recently I put in an order with a reputable online cycling store for a few things that I’d been considering for a while. The commuter bike has been getting flats somewhat regularly lately since for some reason the glueless patches we’ve got don’t seem to want to hold. This brought to mind that it might be a good idea to keep a spare tube on hand for the gravel grinder, Grimey. Formally known as Frank Grimes, Grimey is a 2019 Devinci Hatchet bike with 40mm wide tires, bringing him into the realm of bikes known as gravel grinders.
As I was pondering my options for inner tubes on the website and considering that it would be better for everyone if I scooched over to the local bike shop to pick one up, a thought struck me:
“If you switch Grimey over to a tubeless setup, that will give you two free inner tubes!”
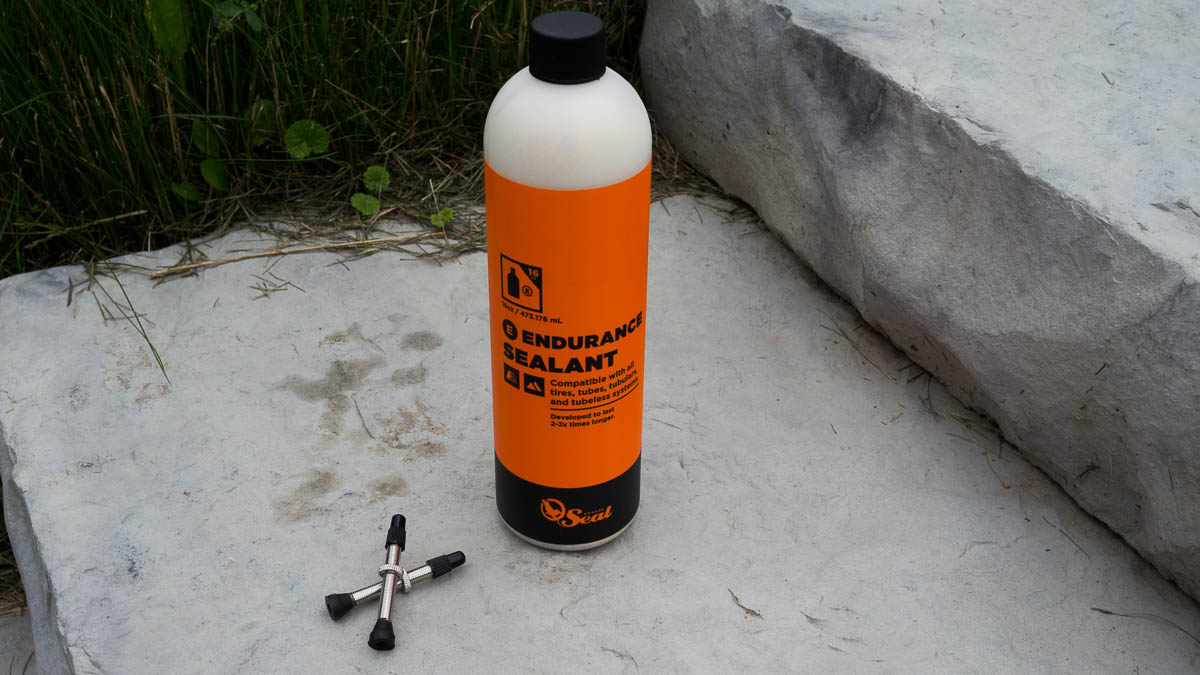
So instead of one inner tube, I procured two 44mm long valve stems. Once they arrived, I dug out my trusty bottle of sealant that has been keeping my full-squisher up and running and dragged all my crap into the back yard for a fun Sunday morning of skipping church and mucking with bikes!
So while I was at it, I figured I would take a few pictures to provide evidence that going tubeless isn’t too difficult an upgrade.
Upgrade?
TUBELESS IS AN UPGRADE and don’t ever let anyone tell you otherwise. As I’ve already stated elsewhere, anything different = upgrade. So uh, how is it an upgrade?
The main benefit of running tires tubeless is that you can use lower tire pressures without worrying about pinch flats. Imagine (or remember) riding your bike up a curb at high speed and not pulling up properly to wheelie/bunny hop onto it. The rubber will squish down to the point where the curb and the rim pinch together like a set of pliers, puncturing the rubber in two places. At this point the tires makes a fweeee sound and you’re hoping you’ve got a patch kit or spare tube or starting to think about who is a good enough friend to come and get you.
With tubeless, this won’t usually happen because the tire rubber is so much thicker than the tube. Even if it does manage to bite through, the resulting hole is usually small enough that the sealant in the wheel is able to seal it and off you go like you didn’t just do something stupid.
Lower tire pressure are also a lot more comfortable when riding on off-road trails of dubious texture. The lower pressure allows the rubber to deform more and conform to the shape of the ground, resulting in a smoother ride. This ain’t just whistlin' dixie either - riding wider tires at lower pressures isn’t necessarily much slower, especially on rough surfaces.
Summary: Tubeless will give you a smoother ride without sacrificing speed and reduces the odds of being stranded in BF nowhere with a tire that won’t hold air. It’s win-win!
The Process
Take your tire off the bike and let all of the air out.
The catch here is that the tire could be really difficult to remove. Oh, and long before this, make sure your tire and rim both say “tubeless ready” on them or things may or may not work for you. Tubeless stuff is made to tighter tolerances since an airtight seal is required for this to work. Feel free to use a set of tire levers to remove the tire from the rim. Extra credit for being able to do all of these steps without tire levers.
Hint: The middle of the rim where you can see spoke holes is the narrowest circumference of the rim. If you can get the rubber into that section, pulling it off the rim is easier. However, sometimes the tire is just stubborn as hell and levers are necessary.
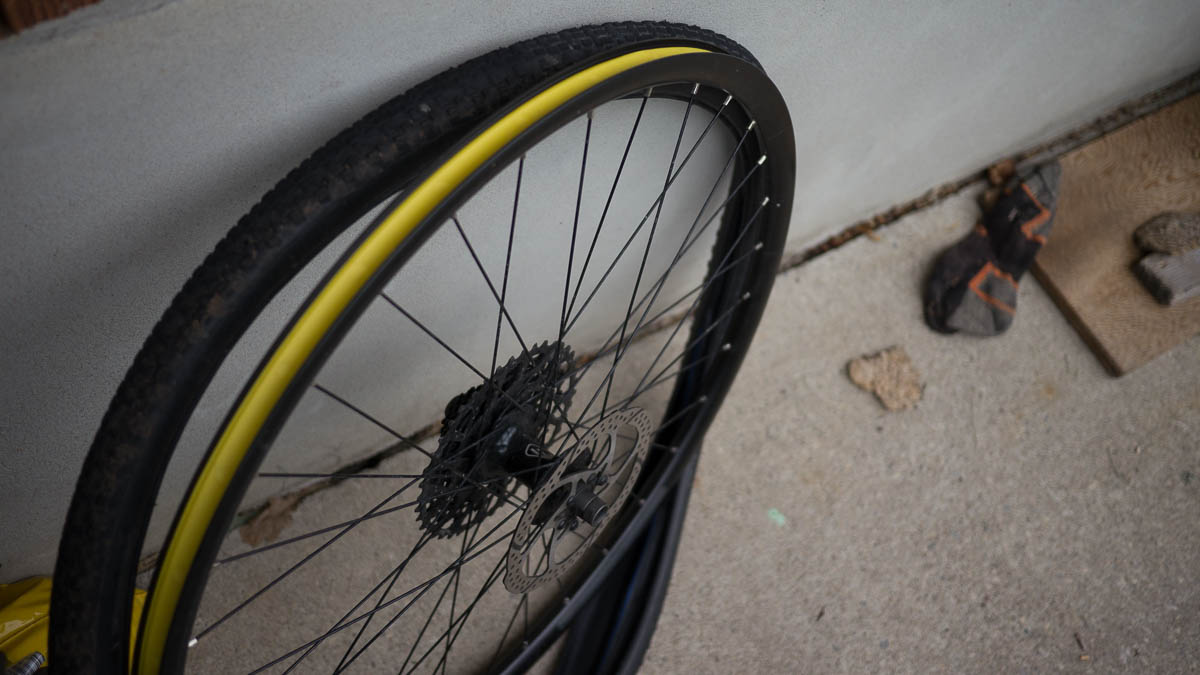
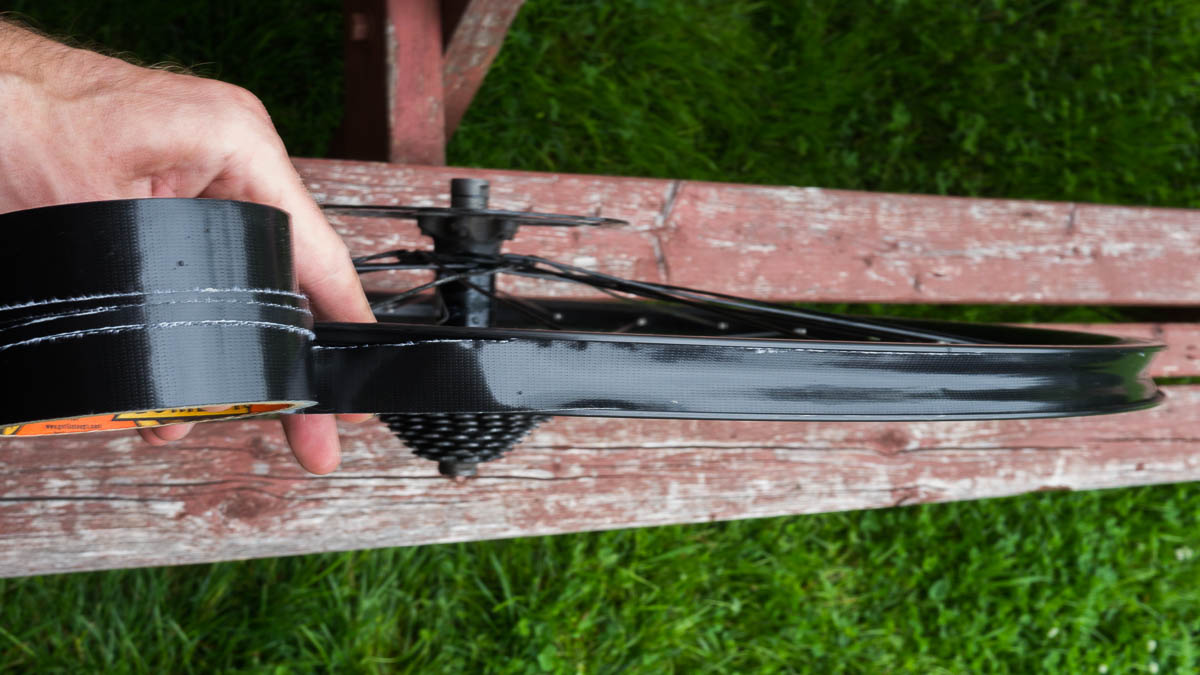
Rip out the stupid yellow “rim-tape” that comes pre-installed in your tire. I assume that it’s mostly there to keep the tube from puncturing on the spoke-holes and it doesn’t actually hold a good seal when inflating things.
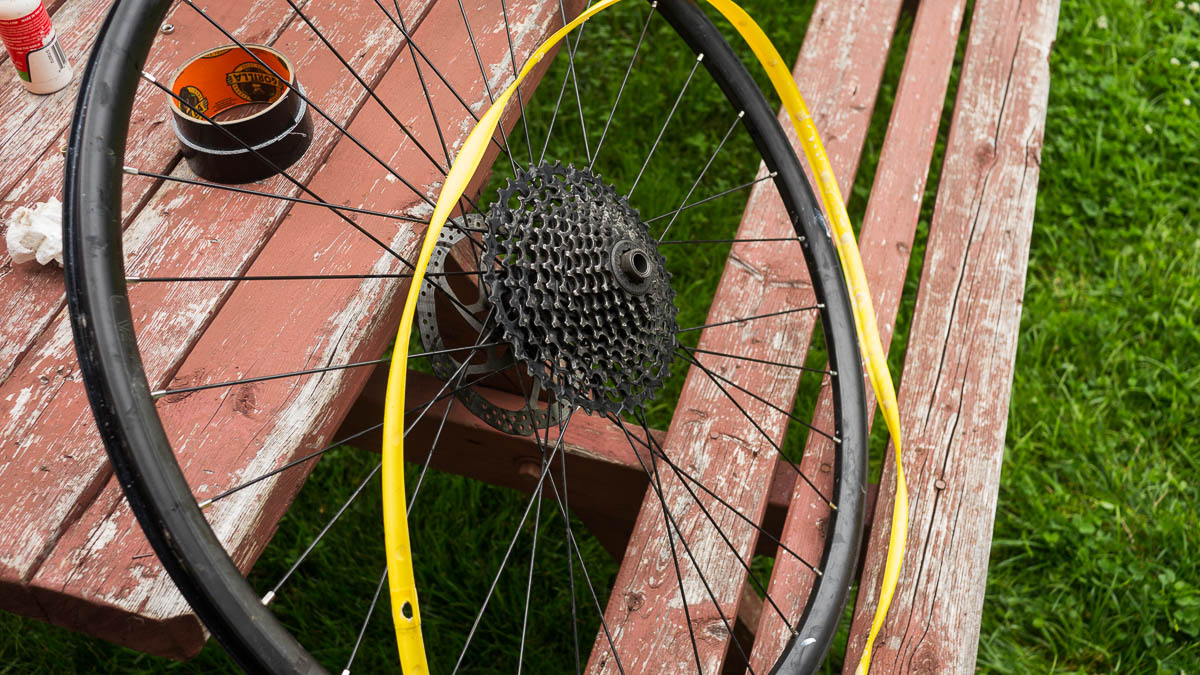
Now that the stupid yellow “rim tape” is out of the way, rummage through the garage and hope you have enough gorilla tape left for this project. You could buy proper rim tape from a shop to do this, but I’m not made of money, just guts and blood like a normal person. Rip a strip just wide enough to reach between the two edges of the rim and wrap it carefully around the whole rim as in the next photo. Be careful not to have it up the rim walls where it can interfere with the tire and bead interface.
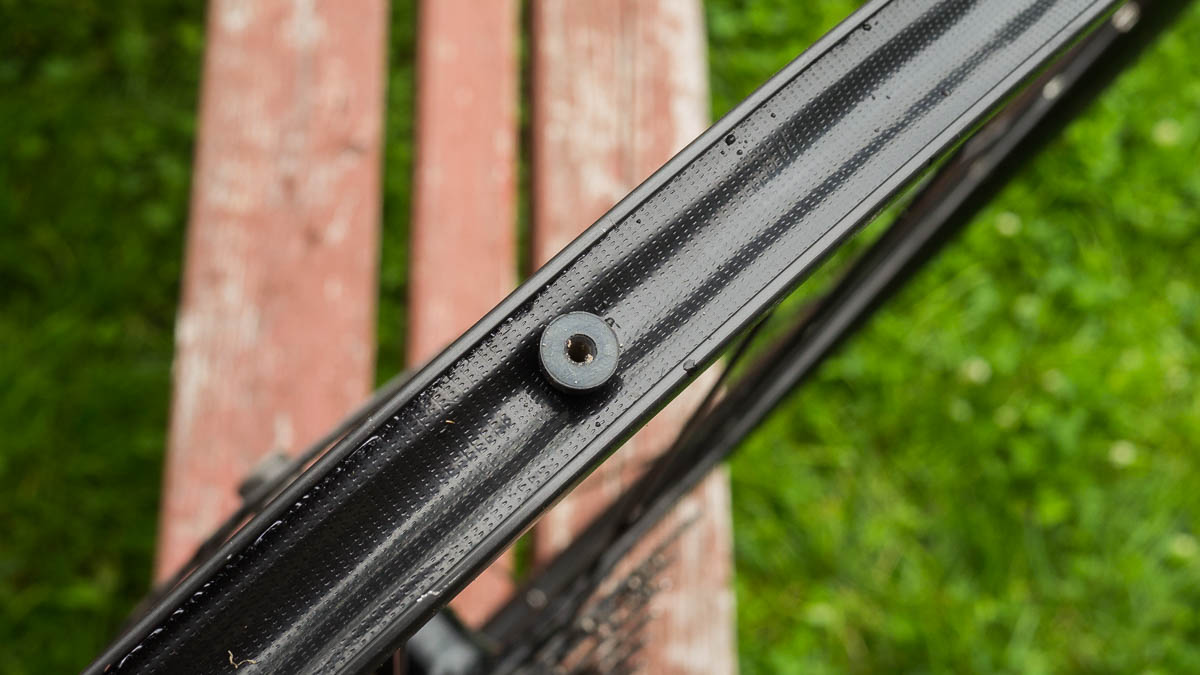
Go around the rim where you’ve just taped and make sure everything is nicely sealed to the rim. This is going to be more or less airtight, keep that in mind. Take your time and do it right, not like me. Seriously, look at that photo above. You can see the little strip in the middle changes width as it wraps around the roll. I’ll be pumped if this thing ever holds air. I mean, I know it will since I’m writing this up after the fact, but what a shit job I did. I would have ripped it all off and started over but you can see in the photo above the photo above that I’m almost out of Gorilla Tape and didn’t have enough to try again. “Good Enough” for the win!
I’ve read some guides where they advise overlapping the tape where the valve goes in. Maybe a good idea, I don’t and things seem to work just fine.
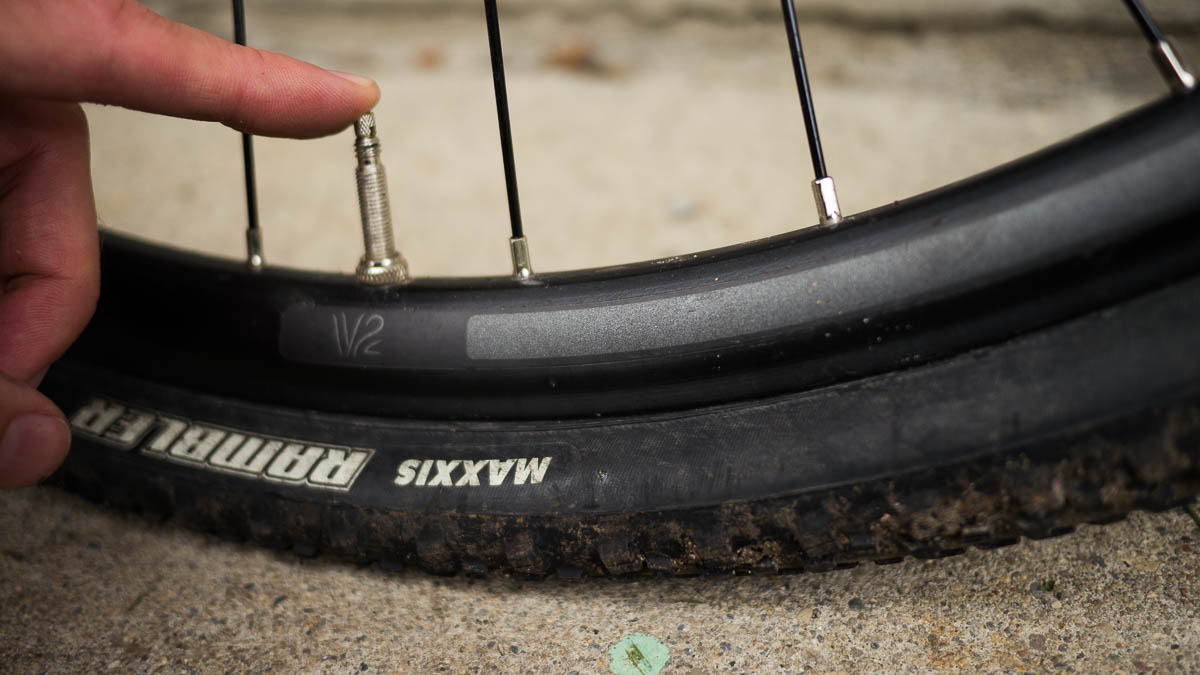
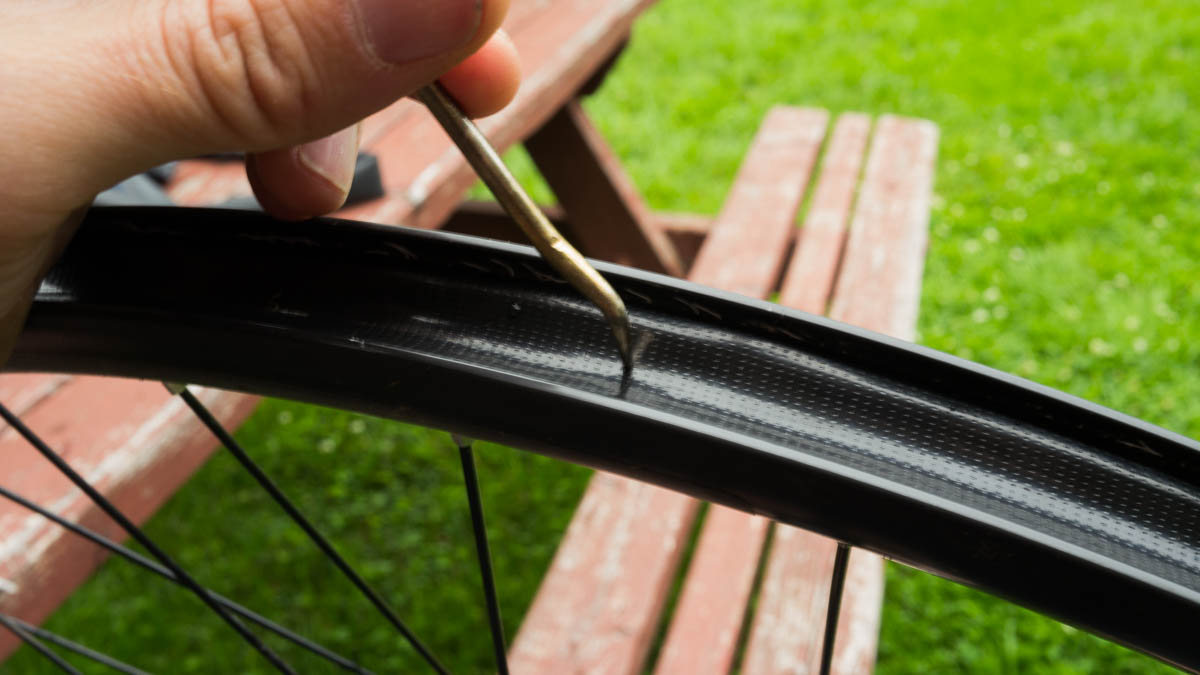
Next step is inserting the valve stem. Grab some sort of sharp object and make a hole in the tape directly above the valve hole in the rim. This doesn’t need to be very big, I just make a hole with this pick and jam the valve through.
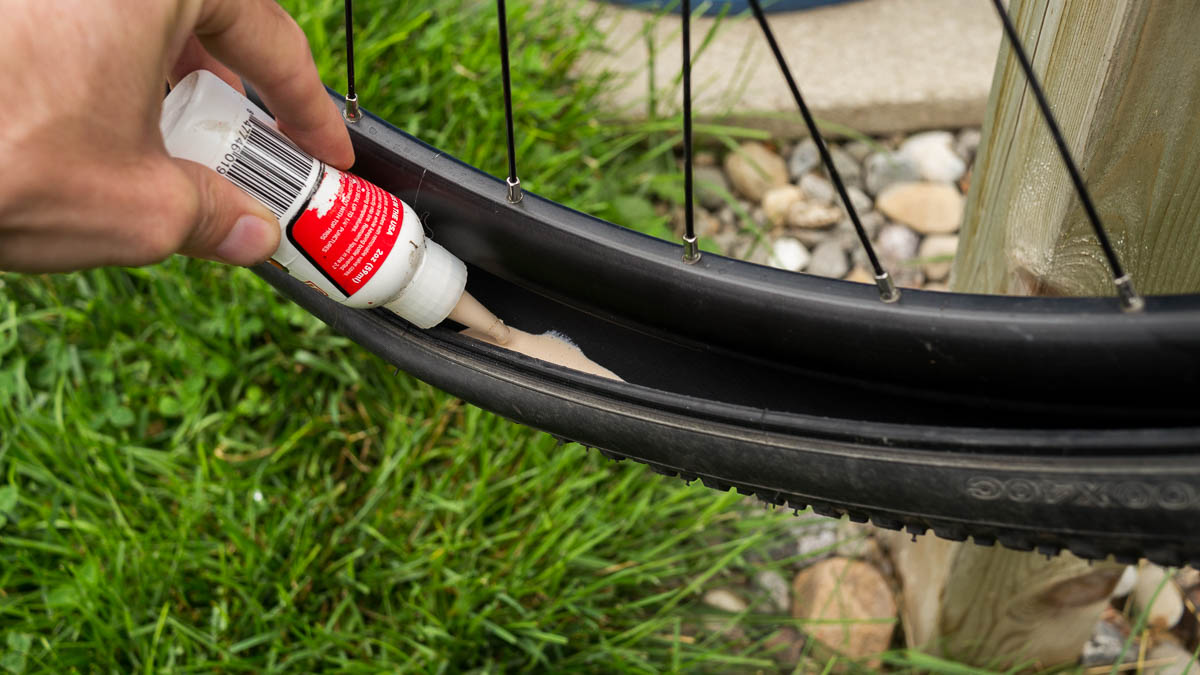
Alright, almost done here. Go grab that sealant you set down somewhere and don’t really remember where. This company recommends about 60 mL for 700c wheels which are what these are. Luckily I’ve got a little bottle from a previous sealant adventure that is roughly 60 mL. Otherwise go rifle through the measuring cups and hope your significant other doesn’t notice. [Editor’s note: He’s kidding, for the love of God do not put tire sealant in anything that will ever again hold food].
When putting the rubber back on the rim, there is one very important thing to remember: make sure the valve lines up with the logo on the tire. This is part of secret mountain biker code and if your valve and logo don’t match up everyone will think/know that you’re a hack.
Now the adventure really begins and you will quickly discover whether your tires are huge pains in the ass or not. Grab your compressor, build some pressure and blow some air into the newly installed valve - before you get to this step, you might need a presta-to-schraeder-valve converter thing that any bike shop can sell you. I did, but luckily I’ve got one on hand.
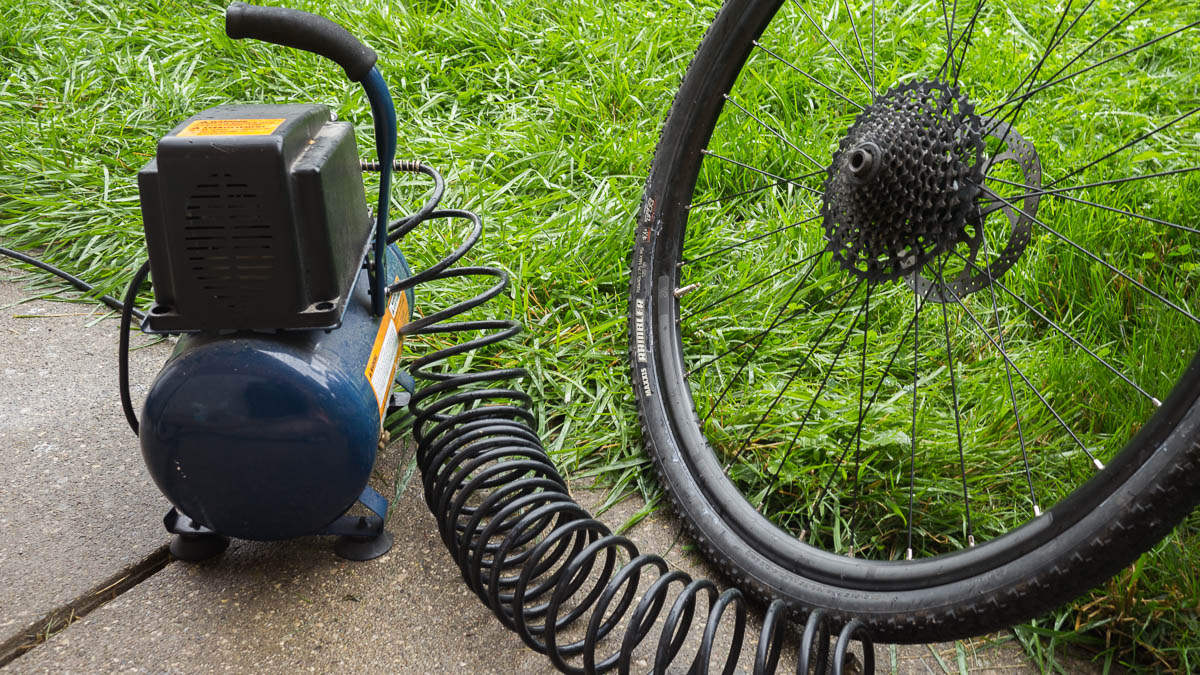
One of my tires seated right away like it has been waiting for this since I got it. The other did not. I tried shaking it about to get the sealant everywhere and sealant just leaked out of every possible place it could. This is probably a good place to say that maybe do this outside or put some newspaper down on the floor or kitchen table (wherever you’re working) before you start.
I ended up pulling the tire back off, wiping everything down with a cloth, adding more sealant and this time it seemed to seal without much fuss. The process took about an hour before I got fed up and did the whole wipe-down thing. Anyone who can consistently and easily seat and inflate tubeless tires should be treated with the utmost respect.
This is a good “con” for the list of reasons why one might go tubeless or not. It’s rarely straightforward to set up.
You did it!! Well, I did it. So now, tires are set up tubeless for the gravel grinder. Grimey. If somehow you touched or got crap all over your brake rotors, now is a good time to give them a wipe with rubbing alcohol (definitely don’t steal isopropyl alcohol from your place of work) to make sure they will be up to their task next time you need them.
The payoff
Free tubes!!!
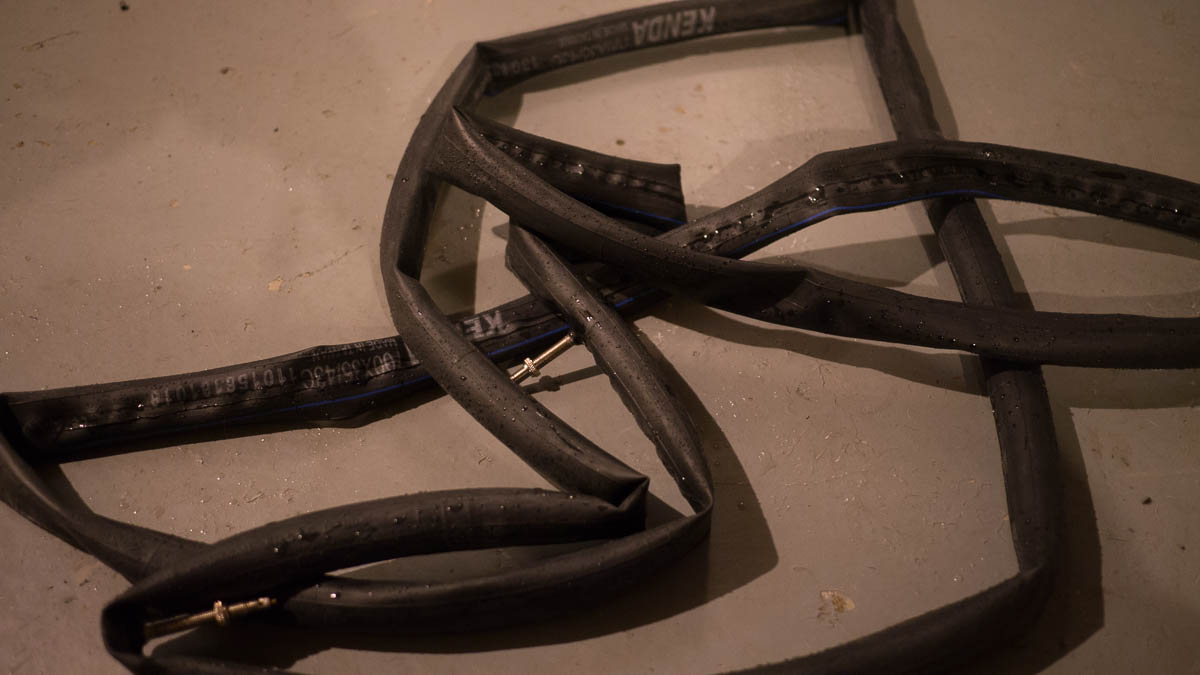
Now when I go for a longer ride I can drag one of these with me just in case and completely negate the weight savings gained by removing them! Score!
Again, I’ll be honest, I mostly just do this stuff because everyone else does and I don’t want to be the odd man out.